Search This Blog

Showing posts with label steam. Show all posts

Friday, January 16, 2026

Prime Time

Our winter warm snap provided a window in which I could prime the Shifter.  Prior to priming I repaired a few fallen details (Super Glue wasn't so super after all...) and Dremel'd out a bit more space in the tender for the new decoder.  I masked headlights, motor, electrical connections and a few other places, then set the boiler on a home made stand.  The other parts I sprayed on a turntable or held by the tape.  The Tamiya Fine Surface Primer, Gray, laid down well and smoothly.  That's a big worry off my mind!  Up next...will I airbrush the black or paint by hand?  We'll see.


Wednesday, January 7, 2026

Golden Time

Upon returning from an inspiring visit to the California State Railroad Museum, I spent a lovely vacation day adding bits to The Shifter.  It took the whole day, in a way, because I'd add a bit then step away to let the glue cure before adding the next bit, waiting, adding another, and so on.  The process is enjoyable, especially when all the parts are at hand and ready to install.

There are still a few bits to add.  Careful observers may notice that at some point in the sequence one of the pop valves falls off the auxiliary turret - not to worry, I have it and will reattach it along with the whistle.  There's also one pipe to run from the engineer's side tank back to the cab, and I need to decide if I want to run piping for the air hoses beyond the pilot.  Otherwise, the detailing is done...well...except for adding the headlight but that's more about the wiring and getting a little in-line plug installed inside the boiler.  That's next.

cab seats

piping from turret to injectors

piping from turret to compressor

"water glass" piping

gauges, before moving, and brake stand

gauges after moving and quadrant

injector control rods


injector water feed line and overflow with diffuser


Friday, January 2, 2026

Another Use for Weldbond

Moving ahead with the Shifter, I turned my attention to the LEDs.  I selected two 0804 SMD LEDs, pre-wired, that I had purchased from WEHONEST on eBay.  Since the headlight housings are metal castings I needed to insulate the back of the LED where the 30 gauge wires are soldered in order to prevent a short circuit.  To do this I used two generous coatings of Weldbond adhesive.  I'll use the same adhesive to hold the LEDs in place before soldering them to the appropriate wires in the locomotive and tender.


Tuesday, December 16, 2025

Just Like the Real Thing


The video below shows the Shifter - minus boiler and tender shell - rolling again under its own power for the first time in, well, I don't know how long.  Years.  I have made an allowance in the wiring for adding pickup from the loco drivers if that's necessary.  So far the Keep Alive circuit in the decoder seems to be working very well.  Time will tell if I need to add more pickup.

While I was operating the engine I had a realization; there's a nice parallel between this model and the real thing.  A real locomotive carries its fuel and water in the tender.  That fuel and water is moved into the boiler where it is used to generate the steam that turns the wheels.  This model picks up power from the tender wheels only.  The power is routed through cables under the tender up into the locomotive body where the motor in the firebox drives the wheels.  Just like the real thing, the tender provides the "fuel" while the locomotive delivers the power.

Up next...testing LEDs in the headlight housings and adding a connector for the front headlight.


Sunday, December 7, 2025

The Rolling Road to Recovery

After the challenges of wiring, and once the new decoder had been ordered, I cut the 4 pads on my soldering board to make 8 pads.  Next I soldered the wires in the tender to the pad.  They're a bit long but I can shorten them once I'm sure the plugs work as expected.  I am making this up as I go along using ideas I've seen elsewhere, tailored to fit this specific situation.


Next I decided to re-install the fireman's side valve gear.  I had left myself a note in the past on a punch list of tasks to shim the left side valve gear.  I wasn't very specific about why it needed shimming or where, so I just reinstalled it to find out.  Turns out it works great as-is.  Huh.  Maybe I fixed that issue years ago and forgot to check it off?  Or maybe it never was an issue.

Next I reinstalled the motor and put the engine on the test rollers - a tool I consider essential for working on steam engines.  Immediately the locomotive reminded me to set the angle of the eccentric, as the wheels wobbled and gahlumped.  After adjusting them the motion was indeed smoother with one major hitch in the gitalong once per revolution.  Hmm.  I'll spare you the troubleshooting thoughts; three of the teeth on the worm gear (that's the one on the axle, not the motor shaft) were chipped.  I briefly worried about finding a replacement until I remembered I had once shimmed the motor to bring the gears closer together.  That did the trick.  See the video below - this smooth low-speed running is on DC, with dry gears and joints.


Confident that the mechanism was working well I turned my attention to the male-half of the wiring.  I trimmed the pins ever so slightly to make that connection as short as possible then soldered wires to each pin.  A little heat shrink tubing and it was ready to install.  Feeding the wires through the holes in the locomotive frame wasn't as challenging as I'd expected though it did take some patient work with tweezers.  I joined the two halves of the connection and reattached the draw bar.

The thing worked well as long as you didn't want to go around any curves.  "Bending" the joint between loco and tender revealed that the friction of the holes on the loco frame was enough to pull the pins out of the sockets on the tender.  So, I tried feeding the wires through only the furthest hole on the locomotive frame, leaving slack beneath the cab.  Voila!  It works, and works well.  I trimmed away some of the loco frame, opening the second holes, and now it fits almost as if it was designed to be that way.  I'll need to leave a little slack in the wires between the motor and the backhead, but there's room for that.


With that established I can move on to completing the detail work on the sides of the firebox and in the cab.  That'll be the subject of the next post. 


Monday, July 15, 2024

Patience, Risk, Reward


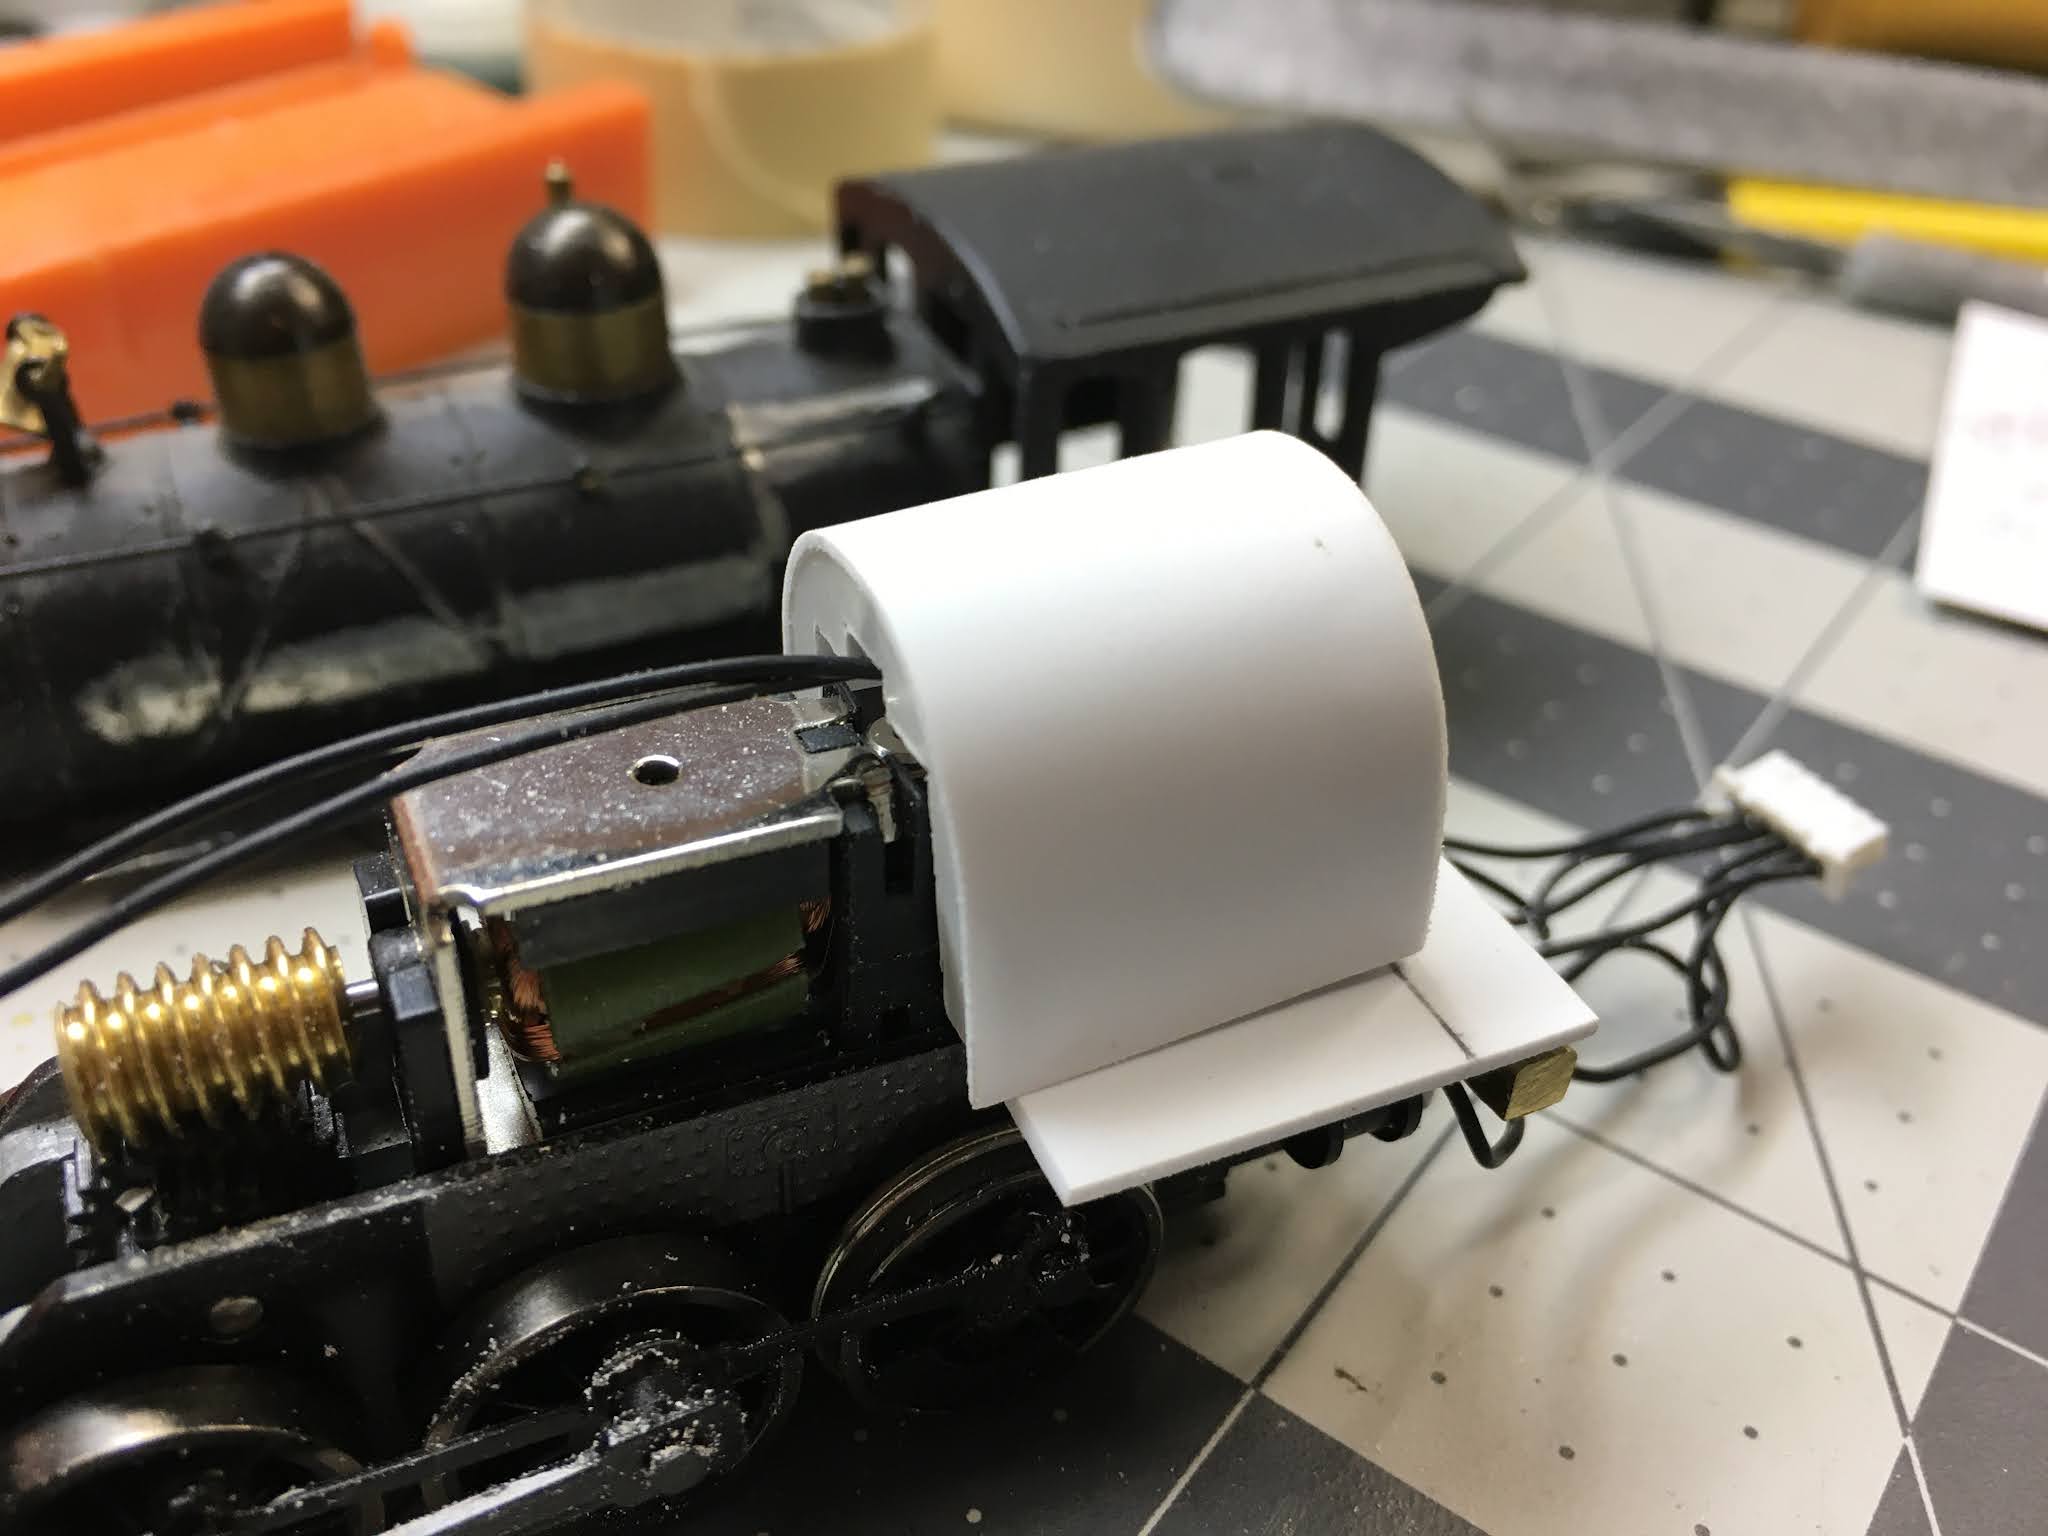
Work on the "Putnam", the 2-8-0 kitbash I had begun a couple years back and recently resumed, had stalled.  The nature of this hobby and the flow of my daily life during the summer had conspired again to remove me from the workbench and shift my focus elsewhere.  But truthfully I wasn't in the mood to do wiring, or really anything, on this engine.  

That's okay.  This isn't a race to some finish line, though I find competitions challenging and deadlines helpful now and again.  This is a hobby that can breed patience if a person sticks with it.  I may groan a little about projects that have been on-again-off-again for years but at the end of the day I don't mind.  As long as I'm engaged regularly with model trains in a hands-on way, I'm content.

Getting back to work on the engine meant tackling a risky wiring job.  I needed to splice in a micro-connector in order to install the headlight and separate the boiler from the chassis.  I've installed DCC decoders before and have done similar work with tiny wires, but this case was particularly risky.  I needed to strip and solder the wires and I only had so much wire to work with.  Thankfully the procedure went as well as I could have hoped, with no hitches or hangups.

The reward was not only a successfully wired connector but a return to the workbench, to a stalled project.  I once asked a fellow modeler how he managed to create such exquisitely detailed steam locomotives.  He replied, by sitting down at the bench and doing something - drilling the next hole, adding the next part, step by step until it is done.  Even if all you do that day is install the smallest rivet, count it as a victory and do it again the next day.  Eventually you'll have a completed model.

I would add one thing to this advice, a step that's crucial for me in overcoming inertia and restarting the modeling momentum.  The locomotive on the bench wasn't sitting idle alone.  All the parts to do the next step were out and ready.  The soldering iron, solder, flux, extra hands with magnifier, micro-connector, wire stripper, side cutters and heat-shrink tubing were all there too.  Setting out all these parts was a vital step, a necessary prologue.

Tuesday, October 12, 2021

Kit-Mingled 2-8-0 - Fit Check VIDEO!

After gluing the cab floor and boiler backhead into one unit and adding styrene strips to the cab walls to hold it in place against the frame, I decided to do a fit check of the whole thing at this point.  So, I reassembled the loco and took it for a quick spin.  As I suspected, the longer Aristocraft boiler and cab closes the gap between engine and tender by approximately 1/8".  Even with the closer spacing the engine will still successfully navigate my 15" to 16" radius curves.  YES!!  That means I don't have to make a new drawbar.  I also decided I'm going to add a plug to the headlight wires so I can mount the light up through the boiler into the headlight housing and not have to fiddle with jamming it up in there each time I reassemble the engine.

Okay, enough blabbing.  On with the video:

Like, Subscribe and all that jazz, because when this thing is done I'll be making a follow-up video for sure.  I'm just tickled with how this project is coming along.  After the struggles of the 2-6-0 project, this one is a breeze.  On to the detailing.


Monday, October 11, 2021

Kit-Mingled 2-8-0 - Backhead

Here's the backhead and cab floor just set in place, not glued to each other, to test the fit.  The boiler and backhead will be glued to the floor.  This unit will remain loose, unattached to either the frame or the cab.  When the cab and boiler are set down over the frame it will effectively sandwich this in place and hold it there.  Then, if sometime down the road I decide to add more detail, I can remove it to make that work easier.  Currently I'm deciding if I want to add a plug inline with the headlight wires to make it easier to assemble and disassemble the engine.  The best part is no part.


Wednesday, October 6, 2021

Kit-Mingled 2-8-0 - Frame Work

This update is really Part 2 of the last post on screws.  I finally finished the frame extension and mounting plate for the boiler screw.  I've been working steadily on each, but the marvelous gray goo I'm using to weld the parts together takes time to cure.  Still, I'm very pleased with the progress at this point and looking forward to the next step; creating a boiler extension inside the cab and mounting the backhead casting.  After that it's just a matter of adding details to the boiler until I'm happy before painting, lettering and weathering.  This isn't a firm date, but I'm shooting for finishing this engine before Halloween.


There's a nut "welded" up above the brass plate in the last image.  I didn't get a shot of that before I put it in place in the boiler, but I used liberal amounts of the Loctite Weld to secure it to the brass bar.  Getting the headlight LED fed through the smokebox up into the headlight housing might be tricky.  I bought two nuts so that I could have a spare if something didn't work, but also I can use one to hold the cylinder saddle in place when the boiler isn't attached.  This has turned out to be a challenging project, but very satisfying working steadily, step by step.

Saturday, March 28, 2020

Mainline Mimicry

...or, how to pull off big-time ops on a small railroad.

A cut of cars await pick up by the eastbound time freight.

I've been playing a sort of operations game that lets me model a snippet of the bigger railroad picture.  My railroad was designed to be a model of a small industrial area served by a short-line railroad with tight curves, a few spurs and a siding that serves as a runaround track.  However, when I planned the track arrangement I included a full loop of track in order to just let trains run from time to time.

 The eastbound arrives and the conductor checks his manifest.

Also, while the industries I selected allow for a limited variety of rolling stock, there are still cars I wouldn't include in a typical operating session when running the railroad as designed.  Same goes for locomotives.  Typical power serving the 'park' is all smaller steam with short wheelbases. 

Lanky Mikado 480 backs down into the siding.

Recently I got the itch to run a longer train.  I pulled out the one and only brass engine I own (and only oil burner), a custom painted beefy 2-8-0.  [There's a whole 'nother blog post about this engine coming eventually...]  I hitched her up to a string of 9 cars and a matching caboose and let her run.  Add a cup of coffee (or something stronger) and a stool to sit on and I'm blissfully unaware, for a time, of all the world's calamities.  After I'd run that engine a few days, I selected 2-8-2 #480, typical power for the Christmas Tree train - again, not a loco you'd expect to see pushing cars down spurs in this setting.

 Three cars are heading east today.  The remaining car will go west.

This is fine for a while - longer than, really - but I wanted to plus the experience.  So, I imagined my 'long' train as a time freight hauling cuts of cars from division point to division point.  I imagined my solitary siding as a place to set out cars for a local to work later or perhaps a town switcher to shove around the local industries, and likewise, to be a place for that time freight to pick up a few cars to forward on to their next destination.

 With the pickups added to the train, the setouts are shoved into the siding.
The local crew will deliver these cars to their industries.

To make this pickup/setout game a bit more random, I chose to employ a simple generator - I flipped a coin.  First flip, heads = odd, tails = even.  Second flip, heads = 1 or 2, tails = 3 or 4.  This determines how many of the cars on the siding I pick up.  Since the siding only holds a max of 4 cars, once I subtract how many I'm taking I can flip again to determine how many I'm setting out as long as it is equal to or less than the number I just picked up.  I may take all 4 cars and only set out three.  Or, I may take one and leave one.  Depends on the flip.

 Their work complete, the crew heads back to the caboose while the engine pumps air into the train.

To complicate things further make things more interesting, I add one more flip to determine if I'm setting out cars from the front or rear of the train.  This shuffles the cars in the whole train, not just the first few behind the engine.  This is also a bit more true-to-life, as cuts of cars would be blocked for just such a set-out according to the order of towns the train passes through and may be anywhere in the train.  The conductor would know which ones were to be put where.


Two blasts on the whistle and it's time to roll.  This is a scheduled freight after all.


I'd love the room to build a railroad where I could model a division point yard, or a major terminal where big steam power is coupled to long trains, which then roll over a long mainline at high speed.  But that's just not possible at present, and I'm okay with that.  I can still have a little taste of that action in minature, so to speak, right here and now.