Search This Blog

Thursday, December 31, 2020

2020 Retrospective

It is time again to look back at the accomplishments of this year and peer into the murky future with hope.  One of the perks of keeping a blog is the ability to scan through the year's doings, at least those recorded on these pages, and recount them.  My first inclination is to say "well, I didn't get much done...ho hum...better luck next time around..." but that's not true.  It is only the pallor cast by the misery of the previous nine months that makes me feel that way.  There's plenty of light amidst the dark days.

In the last twelve months, despite the difficulties of current circumstances, I:

  • restored the "Rimrock Pine and Western" diesel, hopper and caboose for my Christmas Tree Train
  • gathered parts for a trio of Purina ventilated refrigerator cars
  • continued work on the pair of cabeese for my Ocali Creek Railway
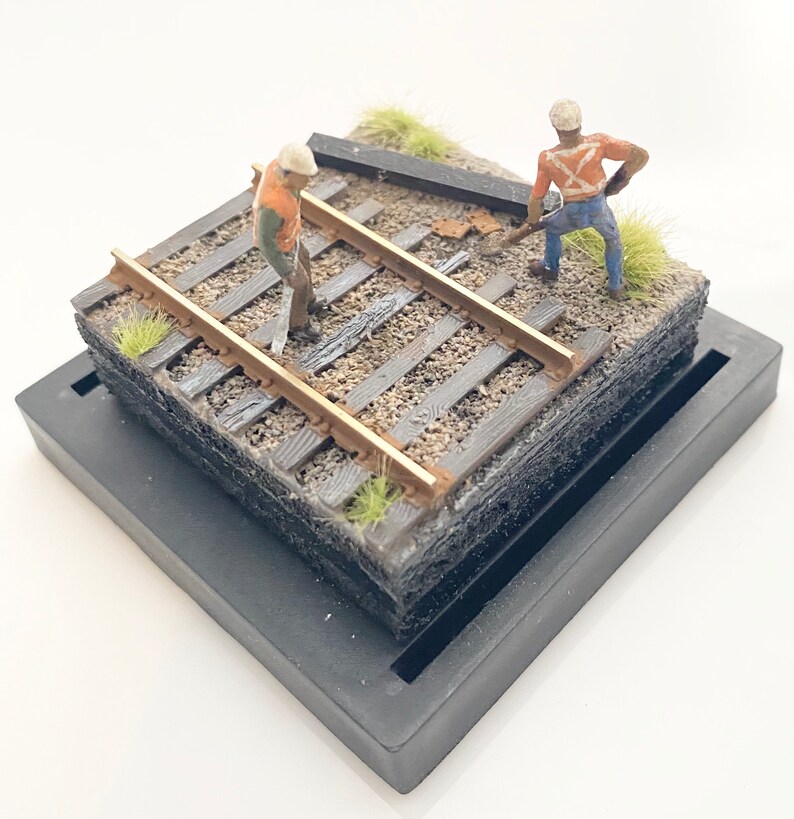
  • tuned the trackwork for trouble-free operation on the railroad
  • simulated mainline operations on my branchline pike
  • made castings with Oyumaru and Miliput
  • scratchbuilt a Fruit Juice stand from a historic photograph
  • painted figures and a slew of details
  • added and painted a fascia frame around the benchwork
  • built a static grass applicator
  • built the "Power Plank" for the railroad's throttles
  • finished the Ocala Springs station using Sequoia Models' Fallberg Station kit
  • built a Woodland Scenics Diamond T Flatbed kit
  • painted more people and parts
  • painted color tabs for all my craft paint bottles
  • and puttered about on a smattering of odd tasks and small projects

In the last month I set for myself a challenge to finish the final details on my 2-6-0, finish the OCRy cabeese and rebuild a pair of Comet freezers.  I'll follow up on that challenge in its own post, but suffice it to say they're coming along well.

I also wrote a few philosophical posts.  This has been a difficult year, especially as an introvert with a family at home all the time.  However, since writing that post back in June I'm happy to say we've developed some strategies for giving me uninterrupted down time to recharge (which is not always modeling time).

In last year's revisions I resolved to avoid spending my hard earned hobby dollars on needless purchases.  That was far from successful.  We are fortunate to have income streams that support our family's needs - food, shelter, clothing, savings, etc. - and a little leftover for hobbies.  I found a few things this year I never knew I needed, but I also invested time organizing what I already have.  I still resolve to better target my spending and overall spend less on my hobby.

Looking ahead to 2021, there are a few specific goals I wish to meet.  While my garage is surprisingly less dusty that I'd thought it would be, the railroad still needs a cover.  After my failed attempt this year I came up with an overly ambitious plan to cover the railroad with a lid.  That's still the plan, but I've simplified the lid concept greatly (no more winch and integrated lighting) and stacked its functions to double as a gaming table.

That last point brings me to another goal.  One of my unexpected purchases this year was actually prompted by my loving spouse.  She gave me a gift token to our local gaming store.  They sell all kinds of board games, Magic cards and tabletop wargaming miniatures.  I brought home the Star Wars Legion core set.  Yep.  Vader, Skywalker, Rebels and Stormtroopers.  This is one reason - a big reason - why I have been upping my painting game this year.  Of course the pandemic has made such in-person gaming with non-family folks impossible for now, but when we're all able to get down to the Sword N Board again for paint nights I'll be there.  

And, covering the railroad is also a prerequisite step for scenery work.  This year I mentioned making little scenic cameos as a means to test various techniques and materials and I will be doing just that.  The Ocala Springs station (and matching outhouse) is complete and ready to install once the foundations can be laid.  Hopefully by the end of 2021 not only will the station be in place, but also a few streets and additional structures.

To close this post I wish you all, dear readers, a happy and healthy New Year!  Thank you for reading, commenting, and joining me on this hobby journey.  I appreciate your interest and hope to share much more with you in the coming days.

Thursday, December 24, 2020

That's How It's Done!

Making steady progress on the Trail Drive to Christmas challenge I set for myself, I turned my attention once again to the cabeese.  A few days back I solved the problem of how to keep the floor removable without wrecking the end ladders.  Just after that I worked on the freezers, getting them primed.  Once again I looked to the cabeese and contemplated the roof walks...oh.  Oh no.  I had forgotten that I needed styrene strip.  Actually, I had remembered and ordered some from a vendor months ago only to have them ship me the wrong product by mistake.  I forgot that I was going to look for more.

To eBay and quick!  A search turned up a seller with not only the 1x6 I like to use, but the 2x3 bracing AND a thing I never knew existed, Evergreen Scale Models ladder "kit".  Merry Christmas indeed!  What?  It's on sale with free shipping?  Happy New Year!  I honestly expected it to take a while, what with holiday shipping and the whole viral disruption slowing down the post, but no, here 'tis, on Christmas Eve.

I almost didn't recognize the package because the seller did it right.  Really right.  Observe:

Each packet taped, top bottom and sides, to a stiff cardboard backing and to each other, respectively.  All inserted into a bubble mailer envelope.

It doesn't always work like this.  I have my eBay horror stories as well, but it is nice when it turns out better than expected.  May your Christmas be filled with pleasant surprises and your New Year with results that surpass expectations!


Saturday, December 19, 2020

Comet Freezer Progress

 ...and a Twelve Days Trail Drive update!


The white body without sides is the Baby Ruth car.  In my color tests I found I got a better match to the original sides when painting the orangey-red over white.  The gray car will have white ends and they're actually primed white though they're hard to see in these shots.  The undersides of both cars will be black and once the primer is cured a bit longer I'll tape off the body and hit both with rattle can black.  The roof of the gray-primed car will be Tuscan Red so it will need a second masking before that color will be airbrushed on.

If you look closely at the second image (right-click and open in a new tab to see it much larger) you'll see my simplified brake rigging.  I tried to make brake levers from styrene and attach it to the center sill, along with a clevis formed from half a Tichy turnbuckle, my usual approach.  Neither worked very well, and in the interest of time I just bent wire and glued it into a hole in the sill.  Done and dusted.  Another simplifying step was using the original grab irons pulled from the Baby Ruth car as roof walk supports at the end of each car.

Okay, on to the update.  These cars are coming along nicely and are on track to be complete by Christmas.  The cabooses are not as far along but could be ready if - and its a big IF - I really push through and make good progress each day.  I'd rather not push too hard.  I'm really pleased with how these projects are all coming together, but I'm also taking time to enjoy the seasonal fun like decorating the house, making treats and playing games with my family.  We're getting nice sunny weather and I like puttering about in my garden, tidying the beds.  So I'm planning on extending this personal challenge into the actual Twelve Days of Christmas, with January 6, 2021 the new target date.

Look for an end-of-year review and resolutions post soon.  Thanks for reading, and I hope you all have a blessed holiday season.

Tuesday, December 15, 2020

Caboose Solution - Finally!

I've been stewing over this for a while.  The last progress I made on this pair of cabeese was back in March when I worked on the cupola windows.  I say "stewing" specifically, because I really wasn't applying any critical faculties to the problem.  But I'm getting ahead of myself.

The problem is was, how to take the dadgum thing apart once the end ladders were attached.  You see, on the donor model the end ladders were crudely "attached" to the roof by friction, being inserted into two slots on the roof.  Likewise they were press fit along with the handrails into the end beam.  But I had to go an get these gorgeous brass ladder kits from SS Ltd with graceful arching extensions that reach up and over the roof, and must be securely attached to both roof and platform, somehow.

In order to remove the body (roof and walls) from the underframe (floor and end platforms) I'd need to either attach the ladder permanently to the roof and not-permanently to the platform, or permanently to the platform and bend it out of the way if I take the body off the floor.  Ugh.  

To solve the problem I sat and thought about it.  No distractions, no devices, just cold logic.  And, here's what I came up with:

I simply sawed the end platforms off of the underframe/floor.  In the image above you can see one platform attached* to the body on the end wall, the remainder of the floor and the other platform laying on the miter box.

Next up is to attach some styrene blocks into the corners of the shell, then drill and tap for screws to hold the underframe in place.  I may never add interiors to these cars but I may add lighting.  But in the interest of getting finished cars that run vs. unfinished cars laying in a box that will someday have lights, I am choosing this option to allow for future upgrades.

*Bonus tip - I spent too much time here messing with the Testors plastic cement, bits of reinforcing styrene, etc., to get a solid bond that never solidified.  Not the cement's fault, but the cheap plastic used on the donor model.  Use super glue (cyanoacrylate) instead.  A few dots of CA, 60 seconds holding the parts together, and it is rock solid.

Sunday, December 13, 2020

Twelve Days Trail Drive!

Howdy Pardners!  Set a spell - this may take some time.

No, I've not gone Quarantine Crazy, I'm channeling my inner cowboy.  One of my earliest memories as a child was playing a card game with my mom called "Trail Drive".  The cards were pictures of cowboys, cattle, chuck wagons, rustlers and sheriffs.  The game was simple - designed for young children - but I remember the vividly colored characters, and getting frustrated losing.  Good times.  

Anyway, it's the concept of the game I'm referring to here.  To get a trail drive started you needed a chuck wagon and two cowboys in your hand.  After that you collected cattle, as many as you could - but watch out - a rustler could stop the drive and you'd be stuck until you were dealt a sheriff.  The concept of needing a few elements to get started before expanding is simple, but crucial to the game.

At the same time I've been reading through Model Railroader back-issues from the '40s.  It seems many model rails would write in describing their pikes and listing off their rolling stock and stable of locomotives.  There was a sense of early beginnings that was palpable in these letters.  Usually there was an indication that the budding magnate had plans to purchase a certain engine or set of passenger equipment, etc. to increase the fun, of course.  There were also mentions of seeking a land grant from the spouse to extend the road, but I want to focus on the equipment.

I view my current situation as a bit of a Trail Drive game.  Most of the trains from my modular club days are packed away because I've narrowed my focus and scope down to a relatively small railroad setting.  Physically I've limited myself to a 4'x6' pike with the 2' aisle space all around (see my post Garage Railroad Plan for more thoughts on this choice).

But the limitation is also applied to locomotives and rolling stock.  I purchased my 2-6-0 and began modifying it in order to have a unique, fine-running locomotive.  Likewise I had purchased long before the mogul a pair of cabeese with parts to customize them as well.  See where this is heading, pardner?  The rolling stock - even if they're not stock cars - are the cattle, so to speak, while the engine and hacks are the chuck wagon and cowboys (you decide which is which - I'll carry the analogy only so far).

Now I've been working on these cabeese and this locomotive for a while.  I started the caboose project back in Washington just over four years ago.  The engine has been running well but recently I decided to deal with the leaning cylinders that have been bothering me, as well as get a coal load in the tender...and tick the boxes on the remaining details like the bell and whistle cords.

Technically the twelve days of Christmas run from the 25th to Epiphany on the 6th of January.  But I'm looking at twelve days UNTIL Christmas and feeling like I might just be able to get a Trail Drive going with my Mogul, the Cabeese, and this here pair of freezers I've been building.  Can I do it?  With parts to add, paint to dry, decals, maybe some weathering...hmmm...as long as no rustlers show up I may just pull it off.

Saturday, December 12, 2020

Surpise Inside

You never know what you're going to find when you purchase used rolling stock.  I bought this car for parts.  

Last night I was giving it a closer inspection when I noticed a distinct thunk coming from inside.  Old dried glue popped loose easily to reveal the source of the sound:

For my Comet cars I've used old tire weights for the additional weight and have tried Loctite "STIK'N SEAL" Indoor Adhesive.  It is "Solvent free, Non-toxic, Low odor, Water clean-up" and transparent, though that last one matters not for my purposes.  It is the sort of adhesive you apply to both parts, allow to go tacky, then press together.  It fully cures in 24 hours.  I wasn't sure it would stick when I first applied it as it comes out of the tube a little runny.  But boy howdy it sticks and has given me confidence to close up these cars.  Hopefully I won't be hearing thunks from within someday in the future - I seriously doubt it.

As for this Oscar Meyer car, I won't be reusing the sides as they are and the rest of the car will be re-kitted.  I was really after the fishbelly center sill as they can be pricey and this was a good deal.  The weight will be reused, held down firmly with a better adhesive.  But that's a project for another day.

Thursday, December 3, 2020

Questions Answered - Model Railroad Research

I really enjoy model railroad research.  Note I didn't say prototype research - that's a related discipline that often overlaps, but it isn't quite the same.  Sometimes you can't find any prototype information, or the book that might contain that nugget you seek isn't in your library or is too darn expensive.  That's when turning to the previous versions of the model might help.  It is also fun to look into the history of the hobby.

When I was in seminary I learned about researching textual variants in ancient fragments of scripture.  Usually you went with the oldest known text, whether it was a papyrus fragment or potsherd inscription.  But often you'd find a greater weight of evidence in say, vellum copies.  Though the papyrus may be older, it may not carry the same authority because there are so many copies of the variant text.  Which do you choose as the basis for translation?

So too with model railroad freight cars.  When a manufacturer, long out of business, produced a freezer* ages ago and advertised they used the car builders diagrams, then that's a pretty good source.  But when another manufacturer makes a copy and varies the details, like using a different color scheme or using a different roof type, and they produce thousands of them, which then get copied by other manufacturers, what do you do?  With no actual prototype data available, which source do you trust to build your version of that freezer?

It is possible the second manufacturer chose to change the model based on their available dies for casting parts rather than incur the cost of making new ones.  Maybe they changed the color scheme to make it less gaudy in the hopes it might sell better.  Or maybe they didn't have much prototype data either!

Re-kitted freezer ready to rebuild.

For the two Comet freezers I'm building as of the writing of this post, I needed to know more before I could add better details.  What type of underframe?  Likely fishbelly.  Ladders or grabs?  Ladders. Et Cetera.  For the MDT car I had good prototype photos thanks to Eric Hansmann and other like-minded researchers.  But the Baby Ruth car?  Only one colorized image - the cover of Hendrickson's Billboard Refrigerator Cars book.  Ends, sides, ladders, underframe all visible in that image.  But what about the roof?  The hatches?

Here's where the kit helps out.  My car came to me already built - thankfully not too damaged and assembled well enough - but the original would have contained hints for the roof on the card from which you punched out the sides and ends (and hatches).  Enter eBay.  A quick search of previously sold items turned up an image that helped.

Read the fine print.  Use magnification if necessary.

Right there on the carrier sheet it says, "NO ROOF RIBS    RED SIDE LADDERS".  This note was obviously missed by many modelers who decided to put ribs up there anyway, as evinced by other eBay searches for this car, even the one I'm rebuilding.  But no matter.  In this great hobby we all get to make creative choices that suit our fancy and build models to our heart's content.

*I use the term freezer instead of the more common reefer for a couple reasons - for a while in the early days of this hobby it was the term de rigueur, like saying pike instead of layout.  But in my current NorCal context "reefer" also has a meaning that I don't care to reference.  I know, most readers of this blog know the difference; I just prefer "freezer", in the same way some men like to wear vests.

Sunday, November 29, 2020

Saturday, November 28, 2020

Printed Parts & Pals

Recently I needed some chairs.  Well, really just one chair right away but more on that later.  After trolling the 'bay and coming up empty I turned to Shapeways.  There I found this seller who offered chairs and desks.  I already have desks.  I need chairs.  Thankfully, the seller was kind enough to bundle the chairs together without the desks.  


In order to offset the shipping cost I took a look at what else he had to offer and was delighted to find amphibians!  I model Florida and that means gators.  I lived there and sure enough, hang around the water long enough and you see them.  I've canoed and even swam with them.  Good times.  But more often you see turtles and occasionally frogs and toads.  

As of this post I've painted the gator and the chair, but not the frogs and turtles.  The gator will likely show up from time to time as a sight gag.  The chair has already found a home behind the station master's desk in the Ocala Springs depot.  More on that in an upcoming post.  The frogs and turtles will make it into the creek scene, someday, on the Pine Branch Park railroad.


If you want to purchase amphibians of your own, or any number of other neat parts, check out David Yale's Shapeways shop: https://www.shapeways.com/shops/dcyale?li=pb


Wednesday, November 25, 2020

Playing with Paint

With the station project nearing completion, I needed to paint two figures before I could wrap it up for now.  But before I did that I decided to insert a mini-project I'd been putting off for a while.  I store my paint bottles in a tray down in a file box.  This works well but has one major flaw - I can't tell what color the paint is unless I lift out the bottle and look.  And even then it isn't accurate since the paint will dry a slightly different color than the way it looks through the semi-translucent bottle.  So a while back I asked my wife for some of these little round stickers and she happily shared them with me and there they sat, with the paints, for months.  Okay, maybe it has been a little longer.


The two figures for the station were not the sole impetus for this project, however.  There lays ahead a far greater painting task, one calling for paint that performs better than these craft paints, at least as they are straight out of the bottle.  And that's the subject of another post...

Tuesday, October 20, 2020

Diamond T Flatbed Update

(Gosh has it been a month already?  Where has the time gone?  Early in the lockdown the days felt like weeks, the weeks like months and the months, well, you get the idea.  Modeling has slowed but not stopped.  Plenty of material to share in the next few weeks, thankfully.  Hang in there...we're all in this together.)

These shots are a few weeks old, but were taken just after I had applied a first layer of black oil wash.  The mineral spirits I used were "green", (which is my preference, to be environmentally friendly), but in this case that meant they had a milky color and thick consistency, making it harder to apply as a pin wash.  I was also a bit uncertain as to the finished result until they dried and with oils that meant a few days.  I have since purchased the traditional non-eco-friendly mineral spirits for my next wash.


I went ahead and painted the pallets that came with this kit though I won't be using them in the scene for which this truck is destined.  Before applying the oil wash I gloss-coated the truck to allow the wash to better find and follow the cracks and crevices.  Also note the poles holding up the cab roof.  These are not included in the kit but nowhere could I find any evidence that they shouldn't be there; just the opposite in fact, so there they are.  A freely hanging cab roof is a thing, but not on Diamond T trucks as far as I could tell.

Oh, and the color?  Just personal preference.  Since these images I have finished assembly.  Weathering still to come.

Wednesday, September 16, 2020

Peak Peeve

Okay, this may sound like a criticism, because it is.  However, I offer it in the most constructive and encouraging spirit so please take it as such.  I have a pet peeve when it comes to how modelers treat the roof ridges of their structures.  Too often have I seen what is clearly outstanding work and thoughtful effort put into a model building only to cap it off, literally, with an unprototypical folded strip of paper or some such shortcut, which is then weathered to match the shingles.  No.

If you're going to shingle a roof, the cap shingles along the ridge need to be just that - individual cap shingles laid according to prototype practice.  Modern homes sometimes have a metal ridge cap over composite shingles, but that's not what I'm talking about.  If you are modeling a metal roof, then a folded strip of paper or styrene painted to match the rest of the roofing material is perfectly acceptable.  But, if you're modeling an earlier era of shingled roofing then there might be another option - the decorative ridge trim.

Here again however is another tempting trap - to just stand the trim along the ridge by itself.  WRONG.  These ornate trim features found on Victorian structures were made to not only add character to the structure but also protect the ridge.  The trim was flanked by flashing that supported the ornate vertical piece and rested on the top row of shingles on each side of the ridge.  Typically it was cast as one piece or built up to make one unit which was attached to the ridge.


This is easily modeled as I have done by painting paper strips to match the trim and gluing them in place.  Simple.  After all have been applied I will go over the trim and strips with a second coat of paint to cover any imperfections.  In this photo you can hopefully see the strips applied beneath the ridges in the front while the others in the back do not yet have it.  The strip in this case is 1/16" wide (high) and trimmed to fit, in order to give the right "reveal" to the shingles below.  The paper material is basic brown paper bag, the same as the shingles.

Admittedly we all pick and choose.  We all decide for which details we will pursue prototype fidelity and on which details we will compromise.  Track is perhaps the most common example.  How many layouts have you visited where the rail was either left unpainted or painted a garish rusty red?  And joint bars or turnout details?  I suspect most folks don't add them, but running trains draws the eye to the track and really well done track detail looks terrific. 

I suspect we've become accustomed to seeing less-detailed track in the same way we accept a strip of folded paper as a ridge cap on a shingled roof.  A quick image search for "decorative ridge trim" will bring many prototype examples and the solution to the problem is, in this case, pretty simple.  I think it looks pretty good, too.

Saturday, September 12, 2020

Just One Tub


Here's a potentially troublesome thought.  If you had to evacuate your home in the event of a fire and could only take just one plastic storage tub of trains, models or railroad memorabilia, what would you put in it?  What would you deem irreplaceable enough to put in the car as you drive away from the house knowing you may return to a smoldering husk?  Let's say you had warning and the time given for selecting these items was 24 hours.  What would make the cut, and what would be left behind?

I faced this choice last year.  Thankfully we didn't have to load the kids and pets and precious few personal belongings into our cars and drive away, not knowing if we'd have a house to return to.  But this year's (early) fire season has once again raised the specter of this issue in my mind.  A few weeks ago a fire bug made a line across the south end of town, setting small fires as he went, only a couple miles away.  Thankfully our local crews were able to extinguish those before they grew. 

Then last week the wind shifted and the "August Complex" turned the sky orange.  This fire in the Mendocino National Forest north of our town has been burning since, well, early August.  The new reality in a world altered by climate change is a hotter, drier, more flammable California (with more intense but fewer rainstorms in the winter).  Times like these make a person reevaluate priorities, and a hobby gets moved down the list.

However, I'm not willing to abandon everything, particularly not the models I've customized.  I take seriously my role as steward of the rare finds I've acquired, lovingly crafted by modelers long gone.  Then there are models that speak to me which I prize more highly than their monetary value.  So when I began packing a tub last year I chose the contents based on their rarity, the emotions they conjure when I hold them, or the unbuilt kits and their potential to bring me joy as I build them in the future, possibly in a new home.

I won't itemize here the things in my tub, but merely submit this post as a way to raise the question for you, dear reader.  What would you put in just one tub?

Monday, September 7, 2020

Covered Wagon

With apologies to Luke Blackbeard; it's not that kind of wagon, but the resemblance is there if you squint.


This was my attempt at creating a dust cover for the railroad.  Yes, there's a 4'x6' HO scale railroad under that sheet.  I say 'was' because I have scrapped this idea altogether.  Getting the sheet up and over the hoops then off again would have wreaked havoc on the poor occupants of the town below, knocking down trees and sending people and autos and maybe even locomotives to the floor below.  That will never do.


Here are the wire hoops, minus the sheet.  Had the sheet been easier to put in place I could have shortened the hoops to cover the ends fully.  But that wasn't the only problem.  The end hoops were being pulled inward by the weight of the sheet.  Reinforcing the hoops somehow would run counter to the simplicity and ease of operation I was shooting for.  This idea, in theory held up but in practice, wasn't sound.


Finally, here is an image of the brass tubing I used as a hoop guide to keep the wire from enlarging the hole over time.  Removing and installing the stiff wire hoops was not difficult.  However, with four hoops evenly spaced, two of the tubes ended up in streets and one in a future parking area.  Sure, I could place an auto over the hole, but I'd have to move them each time I wanted to install the wires.  Not ideal. 


So what to do?  I called in my wife and we put our heads together.  After a brief brainstorm we arrived at the same conclusion.  I will build a lid.  The lid will contain lighting.  LED lighting.  I will install pulleys and a winch to raise the lid and it will become a valance.  Yes, I know, I detest valences.  This one will be different.  Hopefully.


Wednesday, September 2, 2020

Back on Station II

I say I'm back on station again because I had neglected this project again.  But now I'm re-engaged and hopefully this time I'll carry it across the finish line.  In addition to some roof work, I'm finalizing the interior details.  The only major custom work left is the ticket window bars...that's something I'm looking forward to seeing, but not necessarily doing.  It will be a challenge, to be sure.


This post however is about the stove.  Even in Florida a stove in the waiting room or even a fireplace was common.  Winters were cold and coffee was enjoyed year 'round so my Ocala Springs station had to have one.  I'd primed and painted the casting itself a while back but hadn't installed it for lack of a good stove pipe.  I was all set to bend one from heavy wire when I remembered I had saved a few sprues in my bits box.


The nice thing about sprues is they come with elbows and angles built-in, for replicating all sorts of piping.  This sprue segment in particular came from a Jordan kit, already black, so no need to paint.  I drilled into the casting as well as the sprue and CA'd a little bit of wire between as an alignment pin.  Then when that was dry I carefully glued the stove in place...though not carefully enough as I still managed to get glue on the chimney.  Hopefully the mistake won't be that visible through the windows.

Thursday, August 13, 2020

Power Plank...Position? Placement?


Pick your own word.  The idea is, I put the plank in place.  The place is not permanent, but it works well there.  Most of the switching is done at that end of the railroad, and the DCC throttle cord is long enough to reach halfway down each long side of the benchwork.  In this way I can keep hold of the controller while uncoupling, etc.  I do have to set it down to do anything at the other end of the line. 

I purchased an MRC extension plate a while back but realized afterwards that I'd need two in order to put one at the other end AND be able to plug in at the base station.  So, for now, I'm happy as is.  When I run a DC locomotive I have to either operate with a partner as brakeman/conductor or walk back and forth between the train and the throttle.  That's okay too.

Two more things - the color is Mudstone, same as the fascia frame and the whole thing is switched on and off at the power strip, not pictured but just one shelf down and to the left of the plank. 

Friday, August 7, 2020

...the concept and plan...

...but not the whole railroad.

From "At The Throttle", Model Railroader, January 1962, by Linn Westcott

"OUR TOWER OF BABEL FALLETH"

"We model railroaders have many names for the same thing and sometimes several things for the same name.  For instance, is a 'loop' an oval or a baloon-shaped thing?  What is a block?  Sometimes we wonder which end of the train has markers and which has classification signals.  Last year I had the pleasure, along with Whit Towers (our chairman), John Allen, Heube Heubenthal, and others, of serving on an NMRA committee to dig out the various meanings of model railroad words and to assemble them into a glossary.  The result of the first year's work is now in the back pages of the NMRA yearbook.  The work is by no means completed; we may have overlooked many important words and our tendencies to narrow some meanings may not meet with general approval.  For instance, we felt 'layout'* should mean the concept and plan but not the whole railroad. (emphasis mine).  Take a look at the glossary and let the committee know if you feel things are wanting."

I found this editorial while reading through the MR 75 years collection.  Were there responses to this editorial?  I hope so...they should make for interesting reading.

*You may or may not know my thoughts on the word "layout" (click the link to find out). 

Wednesday, July 29, 2020

Power Layout

Not 'layout' as in the modeler's restrictive use of the word, but 'layout' as in the more traditional use, meaning to arrange the components, to lay them out.


Progress on the "Power Plank".  Tiny control panel assembled but not yet wired or mounted.

Tuesday, July 28, 2020

Parts Plank

I use wooden sticks, often tongue depressors as seen here, with masking tape wrapped around them as detail parts painting handles.  These parts are all Milliput duplicates made in Oyumaru molds.  Milliput isn't expensive but I don't want it to go to waste especially if I've gone to the trouble to get my fingers all sticky mixing it.  So, I have a number of molds standing by to make parts with the excess.  Shown here: books, a clock (minus the face), storm drains, crates of lemons, a typewriter, a basket of oranges and a bunch of bananas.


The clock is the part I needed for the station waiting room and the reason I mixed this latest batch of Milliput.  But the grates will be useful as the street scene is installed, the fruit may find a home on the station platform and the books in the office.  There's already a typewriter on the agent's desk so this one will be stored and used elsewhere and the bananas?  Who knows.  They certainly will bring life to any scene with their bright yellow color.

Sunday, July 26, 2020

A Tiny Control Panel

Okay, just the parts for now:

Lauan plywood scrap leftover from benchwork construction, cut on my scroll saw.  An old terminal strip and a DPDT switch.  This will be assembled and attached to the "Power Plank"(trademark pending) as a means of selecting either the DC throttle or the DCC system, both MRC products.

I'm finally getting around to ticking the boxes on the tasks required before I can begin scenic work in earnest.  Yes, I know I could probably paint track, rout out ditches, even ballast or put down some roads or grade crossings or many other projects now, but I'd like to get these preliminary things done so they're not hanging over my head waiting.  Truthfully they won't take long and I'll feel great knowing they're done.  Besides getting the throttles sorted neatly on a board and making it easy to switch between them, I also wanted to get the trim attached and fascia painted, and build a cover system built to keep dust off the railroad.

Friday, July 24, 2020

Flash Tip

The classic Woodland Scenics metal kits are (in)famous for their quality - both positively for the wonderful amount of detail included in the parts, and negatively for all the flash and general cleanup involved in making them look their best.*  I enjoy them and have spent many happy hours painting them.  Recently I began preparing the parts of the Diamond T Flatbed Truck kit.  It will feature prominently in the "streetcar track deconstruction" scene planned for Pine Branch Park.


So here's the tip:  Leave the wheels on the sprue to clean out the flash from the spokes and around the tires.  THEN cut the wheel from the sprue and dress the remaining flash/sprue remnant.  I use Xurons to get a clean flush cut without damaging the tire but if you cut too deep into the tire, just dress it with a file and make that the part of the wheel that sits on the road.  I removed and cleaned two wheels before realizing how much easier it would be to leave the wheels on the sprue and do this work.


*Granted, there are some early runs that don't have nearly as much flash to trim as more recent runs.  I think - this is just my hypothesis - that the older castings are cleaner because the molds are newer.  Is this the case?  Regardless, I tend to look for older kits for this reason and find them to have less flash to remove and fewer casting defects.

Thursday, July 23, 2020

No Visible Means of Support

Look closely at these three photos and see if you can tell what is different:


If you said the garage looks cleaner then God Bless You!  It is, somewhat, but no, that's not what I'm highlighting.  The title might be a clue or maybe not.  Okay, okay, here 'tis:

This was a birthday present back in May.  This tripod can elevate the camera high enough to get the first two shots, then lower to allow the closeup in the third.  Naturally I can bring the leg extensions in and make it even shorter.  It will live inside next to my workbench most of the time, though I hope to have many more reasons to bring it out into the garage in the days ahead.


Wednesday, July 22, 2020

Kidding Ourselves

My son's trains on the shelf below Daddy's trains in 2007 when he was only 2.


"Let's not kid ourselves that in model railroading that we are duplicating prototype railroading.  Our grades are too steep.  Our trains are too short.  Our curves are too sharp.  Our switches are too sharp.  Area is limited.  Rails are too high.  Ties are too regularly shaped and spaced.  Wheel flanges are too deep.  All our trains run with electricity, with a most unrealistic sound.  We persist in running steam locomotives in face of prototype dieselization.  But we do the best we can, and we have a lot of fun."

     -Bill Schopp from Trend Book 138, "Model Railroading", 1956.

Tuesday, July 21, 2020

Needle Drop

A little while back Steve Ramsey over at Wood Working for Mere Mortals made an unusual suggestion.  Go to YouTube and type into the search bar "img xxxx", with the x's replaced by a four digit number.  It is likely you'll find some random video with a handful of views.  Why so few?  Because the person who posted it just left the file number as the video title and may not have included any tags.  Perchance you might just find something worth watching that you'd never even considered.

I did this and here's one of the videos I found:


What are the odds that it would be model train related?  The first was a drag racing BMW.  Pretty cool.  The very next autoplay was the video shown above. 

Pierre had 19 subscribers.  Now he has 20.

Wednesday, July 1, 2020

Red + Yellow =


I need an orange grove in this spot.  Maybe, just maybe, one morning I'll come out to the garage and find it.  Magical plastic cross-pollination?  These days I think anything is possible.  Who knows?

Thursday, June 11, 2020

Pandemic Perspective

This is mostly a social opinion piece, with only a little model-railroad-related content.  Even so, please read on; I promise to not be too controversial. In fact, I hope it will help some folks out there manage stress and anxiety during a difficult season.


One phrase I've heard again and again since mid-March when the self-confinement and protective isolation began is, "...with all this extra time...".  With all this extra time, I've gotten so much _____ done (insert long-overdue project of your choice in the blank).  No doubt, there are more than a few folks who, due to being furloughed or outright fired now have "extra" time on their hands.  I feel for anyone who is watching their savings dwindle away (if they had any!) with few prospects of a job waiting for them in the near future.  Maybe they're just putting an optimistic spin on what is really a rotten situation by crowing about all the spare time they have and how productive they've been.


A similar narrative has come from the modeling community, both plastic addicts and train buffs alike.  One popular meme image showed a room full of kits, a stash of shame as it has been proudly named, with the caption, "We've prepared for this day!" or some-such.  There is a popular opinion floating around that introverts who would typically prefer to be at home working a puzzle or reading instead of socializing, now have permission to blissfully engage in whatever hobby or pursuit they please without fear of scorn.  They are, in fact, the perverse victors in this time of suffering as they hunker down in a hobby room to practice their craft far from the dangers of the viral world swirling outside.


I only wish this was the case in our house*.  For the loner, or the empty-nester, this may be the case, but if you're a stay-at-home-parent, (pun intended) then you likely have had less time than you may have had before.  That has been the case for our household.  We are fortunate in many ways - still able to work safely, with access to grocery delivery or pickup, a garden producing fresh produce and four eggs a day from our backyard flock.  Our income has not been diminished except for some discretionary funds from a side job I had.  But the time I would've gained there has been lost to other responsibilities I'm fortunate to have.  My kids learned how to 'Zoom' to finish the school year, and my wife's job moved online.  I'm still chief cook and bottle washer.


I've learned something very important about myself in this time; as an introvert who gains energy from time spent alone, it is not enough to just 'isolate' in a garage or hobby room or closet.  There is a real need to know that I can pursue my creative pastime without having to let the dogs out or bring them in because they're barking at a neighbor, or answer the phone, or deal with the kids, or any number of interruptions.  I need to know I can have this time free and clear of any other responsibilities.  This is part of the escape factor of the hobby and I know it is important to so many creators out there.

The puzzle in the images above was worked over the span of a few days.  At 1500 pieces it was just a smidge too large to fit on our card table, so the family agreed to work it on the kitchen table where we eat our meals.  A waterproof tablecloth covered the pieces during the assembly and came off after the dishes were cleared so that work could continue.  I know I'm blessed to have a wife and kids who can all sit down and eat at the same table, every night, and who even enjoy working a puzzle with dear old Dad.  We're blessed to have our health in this time, good food to eat, and a house to live in.

But I'm most thankful for being able to sequester away in our bedroom at a little table we've put there where I can file some detail parts or sketch a track plan or paint figures.  I'm especially thankful for my wife that will keep track of the dogs and the kids and the phone while I'm recharging my introvert batteries in that time.  I hope you, dear reader, have the opportunity to recharge and be refreshed in this time.  If you're an introvert, or if you live with one, maybe this post will help.

*I do have the shameful stash of kits, my home hobby shop, and one of the first things I did after the self-isolation lockdown began was to sort my era-appropriate kits into full kits and rebuilds so that I can build or rebuild one when the mood strikes and the time is available.  But I'm not counting on being able to build them all in some grand quarantine 24-hour speed paint build.  I'll be lucky to get one finished, if I manage to start it at all.


Thursday, June 4, 2020

Cameo Components

Synergy!  This post is about gathering together a few ideas that seem to have converged into my mind all at once.  Pull the thread with me:


http://ghosttownmodels.blogspot.com/2020/05/a-small-block-of-buildings.html

Friendly acquaintance and fellow blogger Darryl Huffman's post really unlocked something in my head that allowed divergent streams to come together.  Recently Darryl has been making these little gems; tiny little scenes on a space the size of a business card.  In the post linked above he combined them into a scene along with a section of road between them.


https://www.etsy.com/shop/MountainGoatModels?ref=simple-shop-header-name&listing_id=819061195

I've known Greg Baker, aka Mountain Goat Greg, since the early days of the Big Blue train forum, back when it was 'The Gauge', I think.  Greg has an Etsy store in which he sells itty bitty HO scale dioramas that fit in a 2" display cube.  Recently I was searching Etsy for a related item when I rediscovered Greg's modeling.


The video above is interesting on its own as a static grass tutorial, but for me it has taken on a value beyond simple instruction.  Having just built my own static grass applicator (StaticGrassOne) I revisited Martin's excellent video.  Can you guess what stuck with me about his method?  I'll tell you - he made little test squares for varying textures.

Is it clicking yet?

Google defines cameo as:
  1. a piece of jewelry, typically oval in shape, consisting of a portrait in profile carved in relief on a background of a different color.
  2. a short descriptive literary sketch which neatly encapsulates someone or something.
    "cameos of street life"
I'm going to create cameo components - little dioramas that can be placed adjacent to one another to form a larger scene.  These cameos can stand on their own as expressions of ideas, or as combined they can tell a story.  Functionally they will serve as test beds for scenic techniques, but also places to display models that may not have a place on the current Pine Branch Park railroad. 

Take for example this tower I scratchbuilt a few years back:

A bit of ply, a layer of foam, and rudimentary scenery, yet it is a complete statement about the structure and its location within the bounds of the diorama.  The sidewalk implies it is next to a road, and knowing it is a grade crossing tower implies it is next to railroad track(s).  The sidewalk may also imply an urban or suburban environment, but that context could be changed based on the adjacent cameo components.  (By the way, the static grass on this diorama is from a sheet of premade grass texture, cut to fit).

A few decisions will have to be made regarding the thickness of the base and general dimensions in order to ensure compatibility.  However, once that is set I anticipate this could be the start of something really exciting and fun.  More about the first foray into this format in future posts.

Thursday, May 21, 2020

SG1

Nope, not a Stargate post, but the reference isn't entirely accidental.  I am a Stargate SG-1 fan and to a lesser degree I enjoyed the Atlantis spinoff, though I really wish they'd have done more with the SGU series, but I digress.

Rather, the title of this post has more to do with what happened in the Mojave desert on June 21, 2004.  I was there when Mike Melvill earned his astronaut wings flying Scaled Composites' 'SpaceShipOne' into the edge of space and back.  The coolest part by far was when, after the ship had landed, they hooked it to a pickup truck and drove it down the tarmac so the crowd could get a closer look.

When it came to choosing a name for my static grass applicator, I kicked around a few from Grassinator (say it like Heinz  Doofenshmirtz) to Grass Blaster, but ultimately I just settled on SG1, short for Static Grass One.  Of course the name is far less important than the function of the tool, and this one - so far - works great.

I bought the components to build the thing NINE years ago, so perhaps I should've named it ADT or 'About Dadgum Time'.  Ha. 
It runs on 12 volts provided by an old power supply.  I won't say never throw anything away, but this time it helped to keep a bag of old power supplies.
For the first test flight I decided to see which of these two adhesives performed better.  I'd have to say the Alene's Tacky did the best in terms of overall coverage, while the Sobo tended to be patchier.  That patchiness could be an advantage in the right setting. 

I have much more experimentation to do before I use this on the Pine Branch Park pike, so I am planning at least one diorama to practice techniques for this tool as well as road building, track weathering and tree making.  Look for those in upcoming posts.


Tuesday, May 19, 2020

Framed!

Notice anything different?


Look closer...

Closer...

And here's another corner:

The railroad has been framed!  Finally.  The 12 foot long trim strips have been laying on my garage floor for FAR too long.  The color is my favorite, Mudstone.  I had the Home Depot color match a quart from a sample I brought in.  These images make it look washed out but it is really much darker in person. 

The concept I am developing is that of a picture laid on its back with the three-dimensional interactive painting rising out of the frame.  I debated on whether or not to consider it a plinth on which a sculpture is created, but that doesn't suit the concept.  The frame around traditional paintings serves to isolate the world of the painting from the world of the viewer whether in a gallery, restaurant, office, or in my case, garage.

This frame is complete - there will be no throttle doo-dads or operational whatsits attached.  To my mind that's just visual clutter, no matter how useful.  (My garage is already cluttered enough!).  DCC fortunately reduces the need to rely on a massive control panel of switches and lights.  That said, there will still be a panel for the throttle power supply and controls for lights; it will be on a separate board on a shelf beneath the railroad.

More on this concept in later posts.  I am not the first to pass this way, but not many have...